Hi friends
We will explain here in brief to create WDS using 2008 server.First of all
What is WDS?
Why is it is used?
WDS is Windows Deployment services to Deploy Window operating systems in a computer using WDS Server rather than installing operating system through DVD or CD.
The main feature due to which it is widely accepted is that you can create image of operating system like WIN XP or WIN 7 with all the softwares you needed.Now yo can upload this image to WDS.Thus you can simply format the system using this image.Your computer is ready with all the softwares unlike installing through DVD and installing each software manually leading to wastage of lots of time.
Steps to Install WDS
To add the default boot image included on the product DVD
We will explain here in brief to create WDS using 2008 server.First of all
What is WDS?
Why is it is used?
WDS is Windows Deployment services to Deploy Window operating systems in a computer using WDS Server rather than installing operating system through DVD or CD.
The main feature due to which it is widely accepted is that you can create image of operating system like WIN XP or WIN 7 with all the softwares you needed.Now yo can upload this image to WDS.Thus you can simply format the system using this image.Your computer is ready with all the softwares unlike installing through DVD and installing each software manually leading to wastage of lots of time.
Steps to Install WDS
Requirements
- Windows Server 2008 or Windows Server 2003 SP2 * for the WDS server .
- Active Directory and DNS up and working.
- DHCP server available and authorized by Active Directory on your network. Linux DHCP servers do not need to be authorized by AD.
- Ensure that you are a Domain Administrator.
- Click Start, click Administrative Tools, and then click Windows Deployment Services. If there is not a server listed under the Servers node, right-click the Servers node and click Add Server to add the local computer.
- In the left pane of the Windows Deployment Services MMC snap-in, expand the list of servers.
- Right-click the server, and then click Configure Server (Note that the screenshots included in this document are from Windows Server 2008).

- Follow the instructions in the wizard.
- When the configuration is completed clear the Add images to Windows Deployment Services now check box and then click Finish.
Steps for configuring Windows Deployment Services
To configure the server role, use the following procedure. Then see the following section to add images to the server.
To configure Windows Deployment Services
Now that you have configured the server, you will need to add images. For instructions, see the next section.
Steps for adding images
You must add at least one boot image and one install image before you will be able to boot to the Windows Deployment Services server and install an image.
- Boot images. Boot images are Windows PE images that you boot a client computer into to perform an operating system installation. In most scenarios, you should use the Boot.wim file on the product DVD from one of the following operating systems:
- Client: Windows Vista (with at least Service Pack 1 (SP1)) or Windows 7
- Server: Windows Server 2008 or Windows Server 2008 R2
- Install images. Install images are the operating system images that you deploy to the client computer. You can use the Install.wim file from the product DVD to deploy images for Windows Vista, Windows Server 2008, Windows 7, and Windows Server 2008 R2. For operating systems released prior to Windows Vista, you must create a custom install image.
To add the Install.wim ,you must have at least one of the following Windows Vista, Windows Server 2008, Windows 7, and Windows Server 2008 R2, use the following procedures.
To add the default install image included on the product DVD- In the Windows Deployment Services MMC snap-in, right-click the Install Images node, and then click Add Install Image.

- Specify a name for the image group, and then click Next.

- Browse to select the default install image (Install.wim), which is located in the \Sources folder of the product DVD, and then click Open.
- To add a subset of the images included in the Install.wim file, clear the check boxes for the images that you do not want to add to the server. You should add only the images for which you have licenses.
- Follow the instructions in the wizard to add the images.
- Click the image group to verify that the correct images were added.

- Repeat this procedure to add any additional install images.
To add the default boot image included on the product DVD
- In the left pane of the Windows Deployment Services MMC snap-in, right-click the Boot Images node, and then click Add Boot Image.

- Browse to choose the default boot image (Boot.wim) on the product DVD, located in the \Sources folder.
- Click Open and then click Next.
- Follow the instructions in the wizard to add the image.
- Repeat this procedure to add any additional boot images. When multiple boot images are available to client computers, clients will be presented with a boot menu that displays the boot images.
- If you want to modify any of the settings of the server, right-click the server in the MMC-snap in, and click Properties.

- Now that you have at least one boot and install image on the server, you can perform a PXE boot on a client computer to install an operating system using the steps in the following section.Now WDS is ready.All you need to capture Image of Operating system and upload to WDS
Steps for creating a capture image
To create a capture image
- In the Windows Deployment Services MMC snap-in, expand the Boot Images node.
- Right-click the image to use as a capture image. In most cases, this should be the Boot.wim file from the Windows Server 2008 or Windows Server 2008 R2 product DVD.
- Click Create Capture Boot Image. Note that this will create a new image using the image you select (it will not overwrite your existing image).
 In the next Windows (capture image metadata) leave the Image Name and Image Descriptions alone, and click on the Browse button.
 - 4. Browse to the RemoteInstall\Boot\X86\Images folder (or X64 if using X64), this folder is part of the original WDS setup.
Step 5. Give the filename you are about to create a name eg: RemoteInstall\Boot\X86\Images\windows-noob_captureand click open, then click next, the wizard will auto append .WIM to the filename.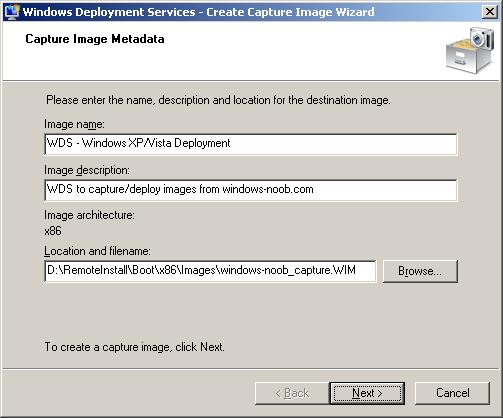
Step 6. The wizard will now start to extract the image from the source image file.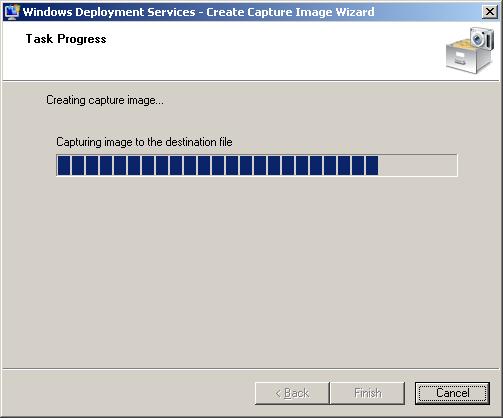
Once it is complete, click Finish.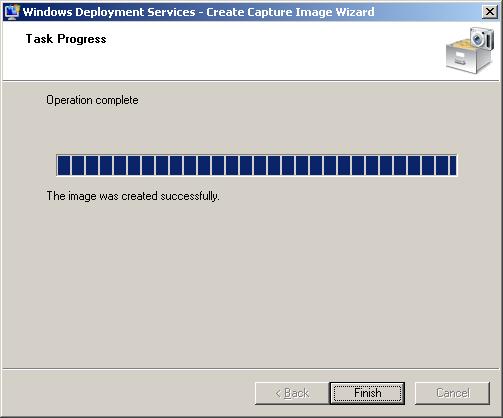
Part 2a - add Capture file to WDS
Step 1. In WDS, select Boot Images in the left pane.
Step 2. in the Right Pane (in an empty area) right-click and choose Add Boot Image
Step 3. In the add image file window, browse to RemoteInstall\Boot\X86\Images and select the capture file you created above, click open and then next.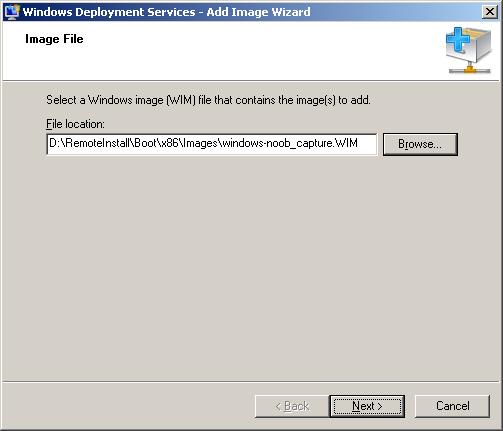
Step 4. set the Image name to 'Windows Vista/XP WDS capture' and the Image description to 'WDS to capture images from windows-noob.com', click next.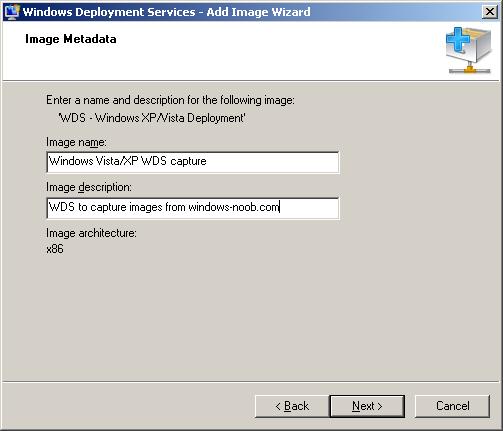
Step 5. Review the choices and click next to add this capture boot image.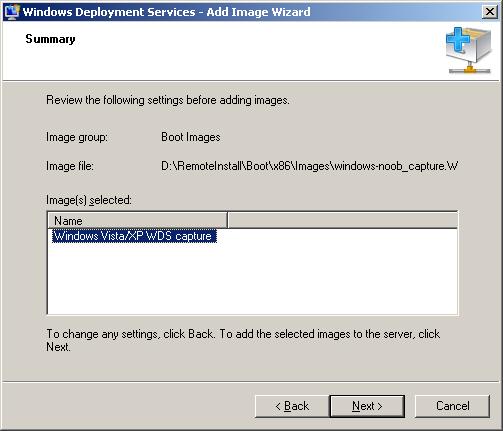
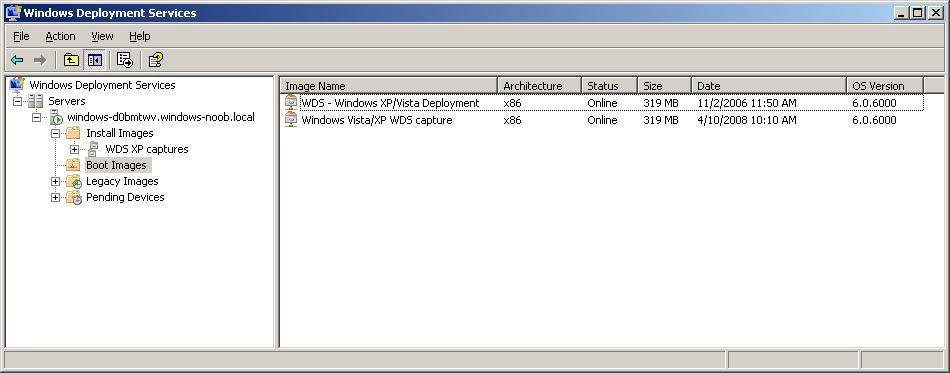
once done WDS will look like this
 1. Create a system with all the software you needed.
2. Run Sysprep utility on that system.The option you need to select are-:

Click on Reseal and it will take some time and reboot.Press F12 when prompted for Network Service boot.
Step 1. In the Windows Boot Manager Menu, select Windows Vista/XP WDS Capture from the available options.
Step 2. After Windows PE has booted, you should see a welcome screen which says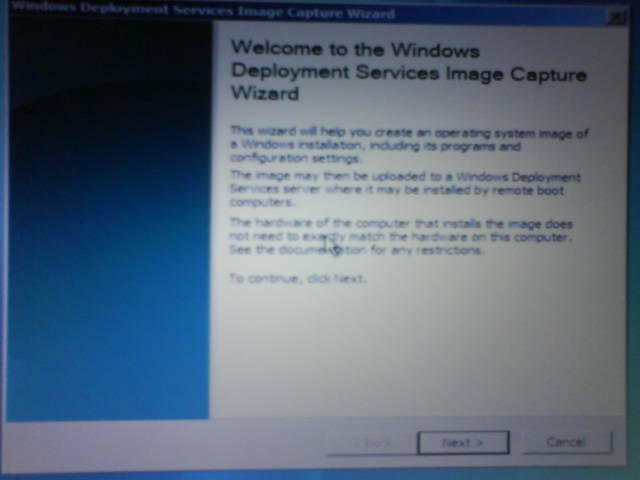 For Volume to Capture, select C:\ from the drop down menu (will not be present unless you have SYSPREPPED)
For Image Name call it 'Windows Vista Ultimate Capture' (if you are capturing Windows XP, change accordingly)
For Image Description, enter 'WDS - Windows (vista/xp) captured image for windows-noob.com'
Step 3. Image Capture Destination:
Here you have the possibility of storing the image on a drive (local) by choosing Name and Location, and clickingBrowse and giving the image a filename, the wizard will auto-append .wim to the file name eg: c:\test_capture.wim.
Next you want to upload the image directly to your WDS server by putting a check mark in the 'Upload Image to WDS server' option, you will have to provide the servername (or use the ip address eg: 192.168.3.1) and then click on theconnect button. After some moments you'll be prompted with a username/password prompt for connecting to the server. I entered Administrator as the user and entered the correct password and selected 'remember my password', followed by 'ok'. You will get prompted for username/password and it complains about not finding the serverOnce you have successfully connected to the server you may get an error which states:-Quote"There is no image group on the WDS server '192.168.3.1'. Please use WDS Management to create an image group."
If you do not get this error-:
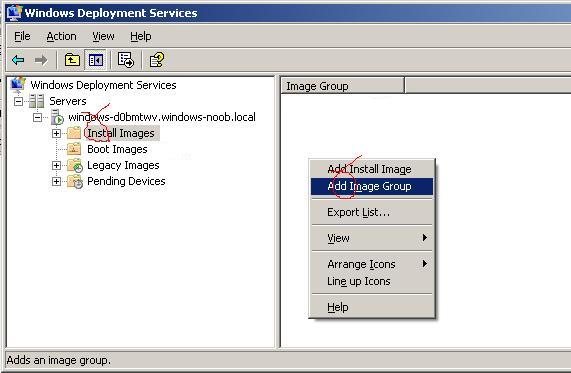
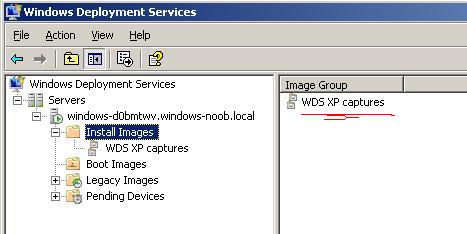
To resolve this error simply go back into the WDS management gui, and select 'Install Images' in the left pane. In the right pane that opens, right-click your mouse and choose 'Add Image Group'. Give this group the name 'WDS XP captures' and retry the above step (5). Obviously if you are capturing Windows Vista, change the group name accordingly.
Once you've added the image group it will appear in the WDS gui like the below screenshot
Step 4. you will now see the 'Image Group Name' option on the Windows Deployment Services Image Capture Wizard allows you to drop down the menu, and from here you can select the captured images group you created above.
Click Finish to continue (and capture the image). The image capture wizard will start capturing the image and you'll see a 'Percent Complete: x%' dialogue box.
Step 5. After a fairly long while of file copying, Click Close to conclude the image capture process, congratulations you've captured an image using WDS !
If everything went well as above, the captured image will have been copied to D:\RemoteInstall\Images\captured images (change the drive letter to match your RemoteInstall drive and obviously the last folder name will change if you use a different image group name), in addition it will be stored locally on the computer you captured the image on (c:\test_capture.wim)Advanced Options
There are two Conditions1.If DHCP and WDS are on the same Machine
 2.If DHCP and WDS are not on the same Server then Below options must uncheck.
 Step by Step Guide to create WDS in server 2008


Hey its really good helped a lot to understand the basic concept.I hope you keep posting such good things
ReplyDeleteGreat..thx
its really nice.
ReplyDeleteReally helpfull.
ReplyDeleteHi
ReplyDeleteafter follow up above steps .. while booting from client system from network i an getting below message can somebody will help me to understand????
"
proxyDHCP did not reply to request on port 4011 wds"
Thanks for the amazing article. My two cents about WDS Server is given below:
ReplyDeleteInstall and Configure WDS Server
Capture OS Image and Deploy OS Image
Deploy OS using WDS Server